

Skontaktuj się z nami
This document describes how to edit and manage an Odoo.com account, including adding a client database, deleting an account, resetting a password, and enabling two-factor authentication.
Grant users access to database
A database can be linked to an Odoo.com account that was created by a different Odoo.com account. This allows the database to appear in the My Databases page of the account. To do so, the client Odoo.com account needs to be added to the database as a user.
First, sign in to the Odoo.com account that created the client database. In the main Odoo dashboard of the database, navigate to the Settings app, and click Manage Users in the Users section. Click the New button, and enter a name in the Name field for this user. Next, enter the email address used to register the desired Odoo.com account in the Email field. Navigate back to Settings using the breadcrumbs, and a pop-up window titled Users Invitations appears, with a warning that adding additional users will increase the amount of the subscription.
Click Confirm, and the Users list appears. An invitation is automatically sent to the email address. Once confirmed, the client database now appears in the My Databases page of the target Odoo.com account.
Tip
To provide full access to the database for this user, set the Dashboard field under the Productivity header to Admin. Next, set the Administration field under the Administration header to Settings.
Delete Odoo.com account
To delete an Odoo.com account, start by clicking the profile icon in the upper-right corner (represented by the username and icon) to reveal a drop-down menu. From the drop-down menu, select My Odoo.com account, which reveals the user portal.
From the user portal, the delete option can be accessed by going to My Account ‣ Edit Security Settings ‣ Delete Account. It can also be accessed by going to https://www.odoo.com/my/home.
Danger
Deleting an Odoo account is irreversible. Be careful performing this action, as the Odoo.com account is not retrievable once deleted.
Upon clicking the Delete Account button, a pop-up window appears, requesting confirmation for the account deletion.
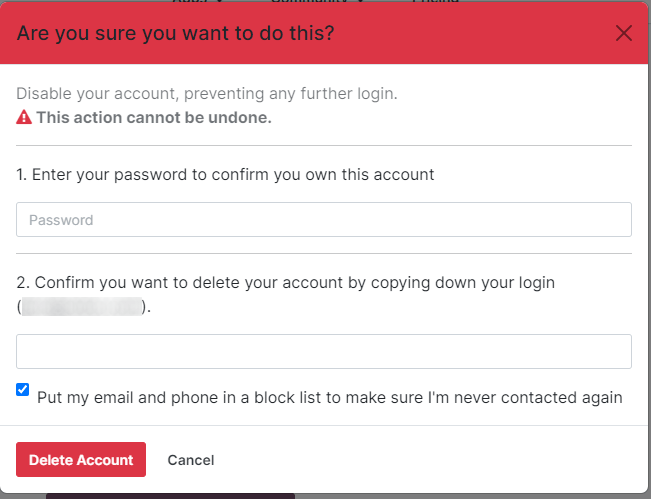
To confirm the deletion, enter the Password and the Login for the account being deleted. Then, click the Delete Account button to confirm the deletion.
