


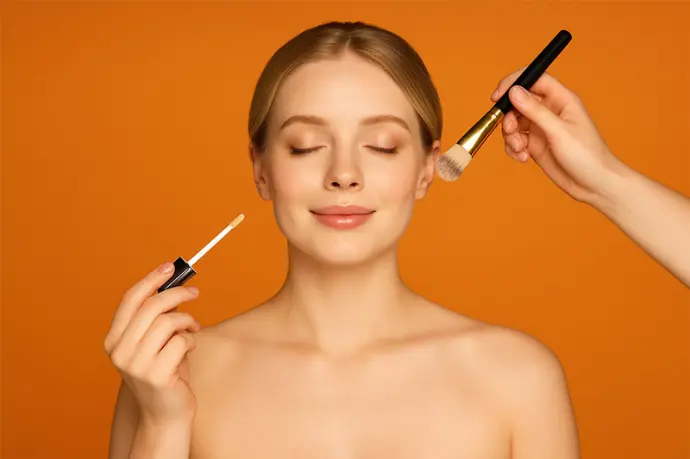
Shade Testing and Selection
Even the best foundation formula won't look good if the shade doesn't match perfectly matched to your skin. Here's how to find your perfect color.
Principles of Foundation Testing
1. Never test on your hand! The skin of the hands has a different shade than the skin of the face. The best place to test is the jaw line, which extends to the neck. The foundation should blend into both the face and neck.
2. Check in natural light. Lighting in stores often distorts colors. If possible, after applying a sample, go outside or stand by a window to see how the foundation looks in natural light.
3. Let the foundation "settle". Some formulas change color slightly a few minutes after application as they react with the sebum and heat of the skin. Wait 5-10 minutes after applying the sample to see the real effect.
4. Test several shades. Choose 2-3 that are closest to your skin color and test them side by side. It is often difficult to determine the perfect shade at first glance.
5. Consider the time of year. In summer, when your skin is more tanned, you may need a darker shade than in winter. Some people have two foundations for different seasons or mix them to get the perfect color.
How to Read Shade Markings?
Manufacturers use different systems for marking foundation shades, but the most common ones you will encounter are:
- * Numbering (e.g. 100, 200, 300) - usually the higher the number, the darker the shade
* Color names (e.g. Ivory, Beige, Tan, Espresso) - descriptive terms for the shade
* Undertone designations - often as letters:
* C, R, P, RO - cool, pink (rose/pink), pink (pink), pink-olive (rose-olive)
* W, Y, G, O – warm (warm), yellow (yellow), gold (golden), olive (olive)
* N, B – neutral (neutral), beige (beige)
Example: a foundation marked "220N" may mean a medium light shade (220) with a neutral undertone (N).
The most common mistakes when selecting a shade
1. Choosing too light a shade - many people instinctively reach for a lighter foundation, which gives the effect of an unnatural, "pale mask". The perfect foundation should blend with your natural skin tone, not lighten it.
2. Ignoring undertone - matching the skin tone is only half the battle. Foundation with the wrong undertone will look unnatural, even if the brightness is appropriate.
3. Testing too many products at once - the skin may turn red, making it difficult to judge the fit. Test a maximum of 3-4 shades at a time.
4. Assessing the color right after application - as we mentioned, some foundations need time to show their true color on the skin.
How to Deal with Difficulties in Choosing a Shade?
- * Mixing two shades - if you can't find the perfect color, you can mix two close shades to get a perfect match.
* Color correctors - if your foundation is close to perfect but has minor imperfections (e.g. too yellow), you can correct it with color correctors (e.g. lavender neutralizes yellow).
* Bronzer and highlighter - can help match foundation that is a bit too light, adding warmth and dimension to the skin.
* Professional help – make-up artists in good perfumeries often have experience in matching foundations. Some brands also offer special devices for skin color analysis.
Step 4: Application Techniques – The Key to a Natural Effect
Even a perfectly matched foundation may look unnatural if applied incorrectly. Learn the tools and techniques that will give you the perfect result.
Application Tools

* Brushes – available in various shapes and sizes:
* Flat, rounded brushes – provide medium to full coverage, ideal for
precise application
* Kabuki brushes – dense, often with a rounded tip, good for blending and obtaining a natural effect
* Duo-fiber brushes (with two types of bristles) – provide light, natural coverage
* Makeup sponges - e.g. beauty blender and similar:
* When used wet, they provide natural, medium coverage
* Ideal for blending foundation into the skin
* They work well with liquid and cream formulas
* Silicone applicators - smooth, non-absorbing product:
* Economical - do not absorb foundation like sponges or brushes
* Easy to use cleaning
* They can provide more intense coverage
* Fingertips - a natural tool, always at hand:
* The warmth of the fingers helps melt the foundation into the skin
* They give good control over the amount of product
* Perfect for light formulas and spot application
Application Techniques
- * Tapping/patting – gently tapping the foundation with your fingertips or a damp sponge. Gives a natural finish and good coverage. Perfect for building coverage in places that require it.
* Buffing – circular brush movements that blend the foundation into the skin. It gives a uniform finish, but may emphasize dry cuticles. Good for mineral and compact foundations.
* Blending - combining, blending the edges to avoid visible lines. Key when moving from the face to the neck.
* Zone application - applying different amounts of product to different parts of the face:
* More product on areas with imperfections
* Less (or none at all) where the skin is already nice
* Allows you to achieve a natural finish while providing good coverage where
it is needed
Skin Preparation – Foundation for Foundation
Even the best foundation will not look good on unprepared skin. Here are the steps you should take before applying:
1. Cleansing – remove sebum, sweat and cosmetic residues. Clean skin is the basis for good makeup.
2. Toning - restore the appropriate pH of the skin and remove the remains of the cleansing agent.
3. Moisturizing – even oily skin needs moisturizing! Choose a cream suitable for your skin type and let it absorb for 5-10 minutes before applying foundation.
4. Primer (make-up base) – an optional but helpful step:
5. Smoothes the skin surface
6. Extends the durability of makeup
7. It may have additional properties (mattifying, illuminating, color correcting)
8. Choose a primer tailored to the needs of your skin and the effect you want to achieve
Foundation Fixing
To make your makeup last all day intact:
* Transparent powders - gently fix the foundation without adding color. Good for all skin tones.
* Colored powders – additionally even out the skin tone. Choose a shade that matches your foundation.
* Fixing sprays – mists that "close" your makeup and extend its durability. Available in various finishes (matte, illuminating, natural).
* Baking method - a technique of applying a thicker layer of powder to selected areas (e.g. under the eyes, center of the forehead, chin), leaving for a few minutes and shaking off the excess. It gives a very lasting effect, perfect for special occasions.
Step 5: Troubleshooting Common Foundation Problems
Even with the best selection and application, sometimes problems with the foundation occur. Here are the most common ones and how to solve them:
Foundation Collects in Wrinkles and Creases of the Skin
Causes:
- * Too thick layer of the product
* Inappropriate formula (too heavy, too matte)
* Insufficient skin hydration before application
* Lack of makeup base
Rozwiązania:
- * Use a thinner layer of foundation, building coverage where needed
* Choose lighter formulas, avoid highly matting foundations
* Moisturize the skin thoroughly before makeup
* Use a smoothing makeup base
* Apply foundation with a sponge moistened with water, which gives lighter coverage
* Avoid excessive powdering, especially in areas with fine wrinkles
The foundation wears off quickly/is not durable
Causes:
- * Inappropriate formula for skin type
* Lack of base and/or setting powder
* Touching the face during the day
* Excessive sweating
Rozwiązania:
- * Choose a long-lasting foundation (long-lasting, long-wear)
* Use a makeup base that will increase the adhesion of the foundation
* Set your makeup with powder and/or a setting spray
* Carry mattifying blotting papers to collect sebum without disturbing your makeup
* Consider the "baking" method on areas where makeup disappears the fastest
Foundation Emphasizes Dry Cuticles
Causes:
- * Insufficient skin exfoliation
* Insufficient hydration
* Too matte formula of the foundation
* Improper application technique
Solutions:
- * Exfoliate your skin regularly (1-2 times a week)
* Use an intensely moisturizing serum and cream before makeup
* Choose moisturizing foundations with a satin or dewy finish
* Apply foundation with a damp sponge, which helps spread evenly
* Avoid excessive powdering
* For very dry areas, apply a little oil before foundation
The foundation looks unnatural/like a mask
Causes:
- * Too thick layer of the product
* Incorrect shade
* Too strong coverage for everyday situations
* Inappropriate lighting during application
Rozwiązania:
- * Use a thinner layer of foundation
* Carefully check shade matching in natural light
* Consider a lighter formula for everyday use (BB cream, tinted moisturizer)
* Apply foundation from the center of the face outwards, gradually reducing the amount of product
Mix foundation with a dab of your favorite moisturizer for a lighter formula
The foundation shines quickly
Causes:
- * Excessive secretion of sebum
* Inadequate care for oily skin
* Too moisturizing/illuminating formula of the foundation
* Lack of matting finish
Rozwiązania:
- * Choose mattifying, oil-free foundations designed for oily skin
* Use a mattifying makeup base
* Use setting powder, especially in the T zone
* Carry mattifying blotting papers or compact powder for touch-ups
* Consider using a mattifying spray as a finishing touch.
